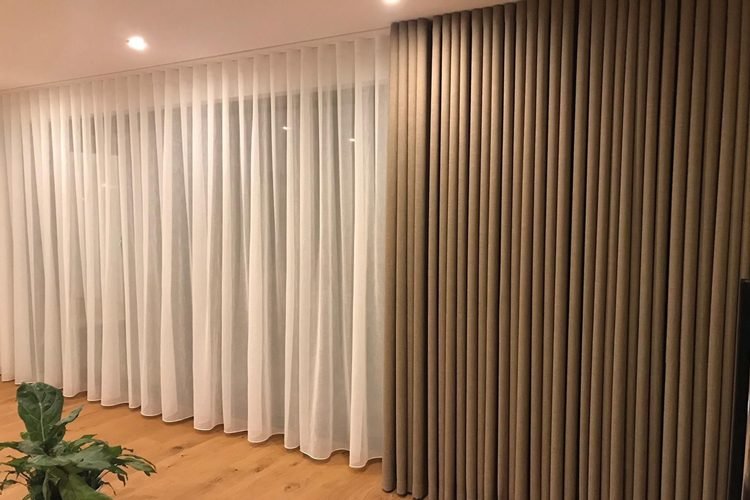
To block light from the top and sides of curtains, mount the rod 4-6 inches above the window and 3-6 inches wider on each side, switch to a wrap-around (return) rod so the fabric curves back to the wall, and seal the edges with magnetic tape or velcro. For a full blackout effect, add a blackout liner and a roller blind close to the glass. The gap between the fabric and the wall is a physical limit, so the more of these fixes you combine, the darker the room gets.
You buy thick Blinds and curtains. You close them at night. But thin lines of light still creep in along the top and down both sides. By 5 a.m., the room is glowing again.
This is one of the most common window problems in homes, and it has nothing to do with how much you paid. Even premium blackout curtains leak light when they are hung the wrong way. The good news: almost every cause is fixable, often in under an hour.
Below are seven practical ways to stop window light leakage, ranked from simple DIY fixes to professional-grade solutions. Each one lists the cost, the difficulty, and where it works best.
Why Light Leaks From the Top & Sides of Curtains
Light does not pass through a good blackout curtain fabric. It sneaks around it. Understanding the gap is the key to closing it.
There are four main reasons light escapes:
- The rod is too low or too narrow. If the rod sits right on top of the window, light spills over the top edge. If the panels barely reach the frame, light pours in from the sides.
- The fabric sits too far from the wall. A standard straight rod holds curtains a few inches off the wall. That open channel on each side is where most side light comes through.
- The panels do not overlap or sit flush. A bright vertical line in the middle means the two panels are pulling apart. Loose panels also flutter and let in extra light.
- The heading type leaks. Grommet (eyelet) and tab-top styles leave open loops along the top rail. Pinch pleat and pencil pleat headings block the top far better.
Once you know which gap is the problem, you can target it directly. Most rooms have more than one, so the best results come from combining fixes.
7 Easy Ways To Block Light From The Top & Sides of Curtains
1. Mount the Rod Higher and Wider

This is the first thing to fix, and it solves the most light at zero material cost.
Steps:
- Remove the current rod.
- Mount the new brackets 4-6 inches above the window frame.
- Extend the rod 3-6 inches wider than the frame on each side.
- Re-hang the panels and check that they now cover the wall, not just the glass.
Raising the rod blocks top light leakage. Widening it lets the panels overlap the wall and close most side gaps in one move.
| Cost | Difficulty | Best for |
| Low | Easy | Almost every room as a first step |
Pros: Free if you reuse the rod, fast, works with any curtain. Cons: Needs wall space above and beside the window; small screw holes if you move the brackets.
2. Switch to a Wrap-Around (Return) Rod

A standard rod holds the fabric flat and away from the wall. A wrap-around rod curves at both ends so the curtain bends back and touches the wall.
This single change is one of the most effective curtain side light seals. It removes the open channel that straight rods always leave.
Steps:
- Measure your window width and pick an adjustable wrap-around rod that extends past it.
- Mount it high and wide, as in Method 1.
- Pull the panels around the curved ends until the edges press toward the wall.
| Cost | Difficulty | Best for |
| Low-Medium | Easy | Bedrooms and nurseries where side gaps are the main issue |
Pros: Designed for blackout; looks neat and finished; no daily fiddling. Cons: A small upgrade cost; still leaves a tiny gap without edge sealing.
3. Seal the Edges With Magnetic Tape or Velcro

This is the classic curtain gap blocking trick, and it gets you closest to a sealed edge without buying new curtains.
Steps:
- Stick a strip of self-adhesive metal or velcro down each side of the window frame and across the top.
- Attach the matching magnetic strip or velcro to the back edge of each panel.
- Close the curtains and press the edges flat against the frame.
The seal holds the fabric tight to the wall, so no light slips down the sides. Magnetic strips last longer than velcro and are easier to open and close each day.
| Cost | Difficulty | Best for |
| Low | Easy | Renters and quick fixes; pairs well with any rod |
Pros: Cheap; very effective; removable; renter-friendly. Cons: Velcro wears out over months of daily use; avoid small loose magnets around young children and pets, so use continuous tape instead.
4. Add a Blackout Liner to Your Curtains

If you love your current curtains but they let light through, a blackout lining gives them the density they lack. This is one of the most reliable bedroom darkening solutions.
Steps:
- Buy a ready-made blackout liner panel or a clip-on lining sized to your curtain.
- Hook or clip it onto the same rings as your main curtain so the two hang together.
- Make sure the liner reaches the full width and height of the panel.
| Cost | Difficulty | Best for |
| Low-Medium | Easy-Medium | Decorative curtains that look good but leak light |
Pros: Keeps your existing curtains; adds insulation and reduces noise too. Cons: Adds weight; clip-on versions can sag if undersized.
5. Fit a Pelmet Box, Cornice, or Valance for the Top

The top gap is the hardest to hide because it sits above eye level. A pelmet box, cornice, or valance is a structure that covers the entire top of the curtain and the hardware behind it.
A pelmet or cornice gives a hard, sealed cap over the top. A fabric valance is softer and more decorative, so pick a thick fabric if blackout is the goal.
Steps:
- Measure the width of your rod plus the brackets.
- Fix the pelmet or cornice to the wall or ceiling so it sits over the top of the curtains.
- Check that it overlaps the rod fully, with no glowing line above the fabric.
| Cost | Difficulty | Best for |
| Medium | Medium | Stubborn top light leakage; a high-end, finished look |
Pros: Blocks top light completely; hides hardware; looks premium. Cons: More effort to build or install; harder to remove later.
6. Layer a Roller Blind or Shade Close to the Glass

Curtains hang away from the window. A blind or roller shade can be fitted right against the glass, inside or close to the frame. Layering the two creates a double barrier.
The blind blocks light at the glass. The curtains catch whatever slips past the blind’s edges. Together they handle both the top and the sides.
Steps:
- Install a blackout roller blind or cellular shade inside the window recess, as close to the glass as possible.
- Hang your curtains over the top, mounted high and wide.
- Lower the blind first at night, then draw the curtains.
| Cost | Difficulty | Best for |
| Low-Medium | Easy-Medium | Rooms with large windows or strong morning sun |
Pros: Strong light control; flexible (use blind alone in the day); adds privacy. Cons: Two products to buy; the blind’s own side channels may still leak a little.
7. Install a Sealed Track or Magnetic Flush Curtain System

This is the professional-grade option. Standard curtains reduce gaps. A sealed system removes them.
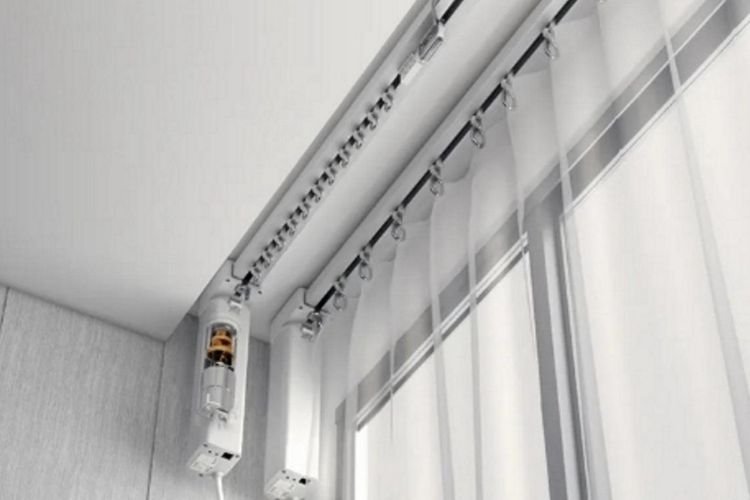
A ceiling-mounted track holds the fabric closer to the wall than a rod ever can. A magnetic flush system uses metal strips on the frame and magnets sewn into the panel, so the curtain locks against the wall on all sides with no channel at all.
Steps:
- Choose a blackout track or a magnetic flush curtain kit sized to your window.
- Fix the track to the ceiling, or stick the metal strips to the inside of the frame.
- Snap or draw the panels into place so the edges sit flat against the wall or frame.
| Cost | Difficulty | Best for |
| High | Medium | Shift workers, nurseries, and anyone needing near-total darkness |
Pros: The closest a home setup gets to true blackout; also cuts draughts and noise. Cons: Higher cost; track installation is more involved than hanging a rod.
Quick Comparison of All 7 Methods
| Method | Fixes | Cost | Difficulty |
| 1. Higher & wider rod | Top + sides | Low | Easy |
| 2. Wrap-around rod | Sides | Low-Medium | Easy |
| 3. Magnetic tape / velcro | Sides + edges | Low | Easy |
| 4. Blackout liner | Through-fabric light | Low-Medium | Easy-Medium |
| 5. Pelmet / cornice / valance | Top | Medium | Medium |
| 6. Layered blind or shade | Top + sides | Low-Medium | Easy-Medium |
| 7. Sealed track / magnetic system | Top + sides + edges | High | Medium |
Best Combination Method for a Full Blackout Effect
No single fix gives a perfect blackout, because the gap between fabric and wall is a physical limit. The darkest rooms stack several methods together.
Here is the combination that works best in most homes:
- Mount a wrap-around rod high and wide (Methods 1 + 2) to close the biggest top and side gaps.
- Add a blackout liner (Method 4) so no light passes through the fabric itself.
- Seal the side edges with magnetic tape (Method 3) to lock the panels flush to the wall.
- Layer a roller blind at the glass (Method 6) as a second barrier for the brightest mornings.
This layered setup blocks light from the top, the sides, the centre, and the glass at the same time. If you need verified, near-total darkness for shift sleep or a nursery, upgrade the rod step to a sealed track or magnetic flush system (Method 7).
Bonus Tips for a Better Sleep Environment
Blocking the window is only part of a dark, restful room. A few extra steps finish the job:
- Close the centre gap. If a bright line glows where the two panels meet, add more overlap in the middle or use a clip to hold them together.
- Weight the hems. Light panels flutter and let in light. Sewn-in hem weights keep them still and flat.
- Hunt for stray light sources. Standby LEDs on a TV, charger, or router can light up a dark room. Cover them with a small piece of tape.
- Mind the door gap. A draught excluder or door sweep blocks the line of light under the door.
- Keep the look consistent. Mount all rods at the same height across a room for a clean, finished feel that also seals each window evenly.
FAQs
Why does light still come through my blackout curtains?
The fabric is doing its job; the light is coming around the edges, not through the cloth. Light leaks from the gap at the top, down the sides, and where the two panels meet. Fixing the rod position and sealing the edges solves most of it.
Can curtains alone block 100% of light?
Not completely. There is always a small channel between the fabric and the wall. Curtains can get very close to darkness, but only a sealed track or magnetic flush system removes the gap entirely.
How do I make curtains sit flush against the wall?
Use a wrap-around (return) rod so the fabric curves back to the wall, then add magnetic tape or velcro along the side edges. Mounting the rod wider than the window also helps the panels press toward the wall.
What is the cheapest way to block side light?
Magnetic tape or velcro strips along the window frame are the cheapest effective fix. They seal the side edges and cost very little, which makes them ideal for renters.
How can I block light without drilling, as a renter?
Use adhesive magnetic strips, removable velcro, or tension-mounted blinds inside the frame. These reduce light well and leave no permanent marks. Just note that no-drill setups leave slightly more gap than a screwed-in rod.
Does the type of curtain heading matter? Yes. Grommet and tab-top headings leave open loops at the top that let light through. Pinch pleat and pencil pleat headings sit tighter and block top light far better.
Conclusion
Light leaking from the top and sides of your curtains is almost always a fit-and-fitting problem, not a fabric problem. The fastest wins are mounting the rod higher and wider, switching to a wrap-around rod, and sealing the edges with magnetic tape.
If you want one recommended approach, start with a wrap-around rod mounted high and wide, paired with a blackout liner and magnetic edge seals. That combination is affordable, renter-friendly, and blocks the top, sides, and centre in one go. For true, near-total darkness, add a roller blind at the glass or move up to a sealed track system.
Fix the gap, not just the fabric, and the room finally goes dark.